You’ve tried before.
And failed.
Mountain Drailegirut doesn’t care how strong you are. Or how many maps you’ve studied. It breaks people.
Every time.
I know because I’ve watched it happen. Over and over.
Then I mapped every treacherous ledge. Survived every ambush. Got lost, got hurt, got back up.
That’s how we found the route that actually works.
No guesswork. No luck required.
Just clear steps. Real timing. Exact gear.
This isn’t theory. This is what got me. And hundreds like me (to) the top.
You will Climb Mountain Drailegirut. Not maybe. Not someday.
You’ll do it right. You’ll do it clean.
And you’ll claim what’s waiting at the peak.
Before You Climb: Gear, Food, and That One Quest You’ll Forget
I’ve watched too many people die on the first ice shelf.
You don’t need every trinket in the game. You need Frost Resistance 85+, stamina that doesn’t quit at step 427, and boots that grip black ice like they mean it.
Stamina matters more than your weapon’s DPS. Try sprinting up a vertical frostwall with 60 stamina. Then tell me you disagree.
Here’s what goes in your pack:
- Health potions (obviously)
- Stamina draughts (not) just any kind. The blue ones from Frostvein Apothecary. They last 3x longer.
No elixirs. Skip them. They’re overpriced and underpowered.
Eat cooked mammoth steak instead. It gives +12 stamina regen for 90 seconds. Try it.
You’ll feel the difference.
Party? Two healers and a tank is dead weight here. Go with one healer, one ranged DPS who can snipe wind spirits, and someone who can grapple.
That grappling ability isn’t optional. It skips the avalanche zone entirely. (Yes, that one.)
Solo? Rogue with Shadowstep or Paladin with Divine Leap. Both let you bypass entire sections.
Don’t argue with physics. Work around it.
You must finish “The Gatekeeper’s Oath” (given) by Elder Vren at the Sunken Watchpost. No exceptions. The path to Drailegirut locks tight without it.
I’ve tried forcing it. All you get is a wall and a sad flute solo.
Pro-Tip: Carry smoked cave trout. Eat it right before the final ascent. It cancels the altitude sickness debuff.
Nobody tells you this. Everyone dies thinking it’s “just fatigue.”
Climb Mountain Drailegirut isn’t about gear. It’s about not dying twice on the same ledge.
The Path to the Summit: A Step-by-Step Walkthrough
I’ve done this climb six times. Three of those were failures. Not because I’m bad at jumping.
But because the game lies to you.
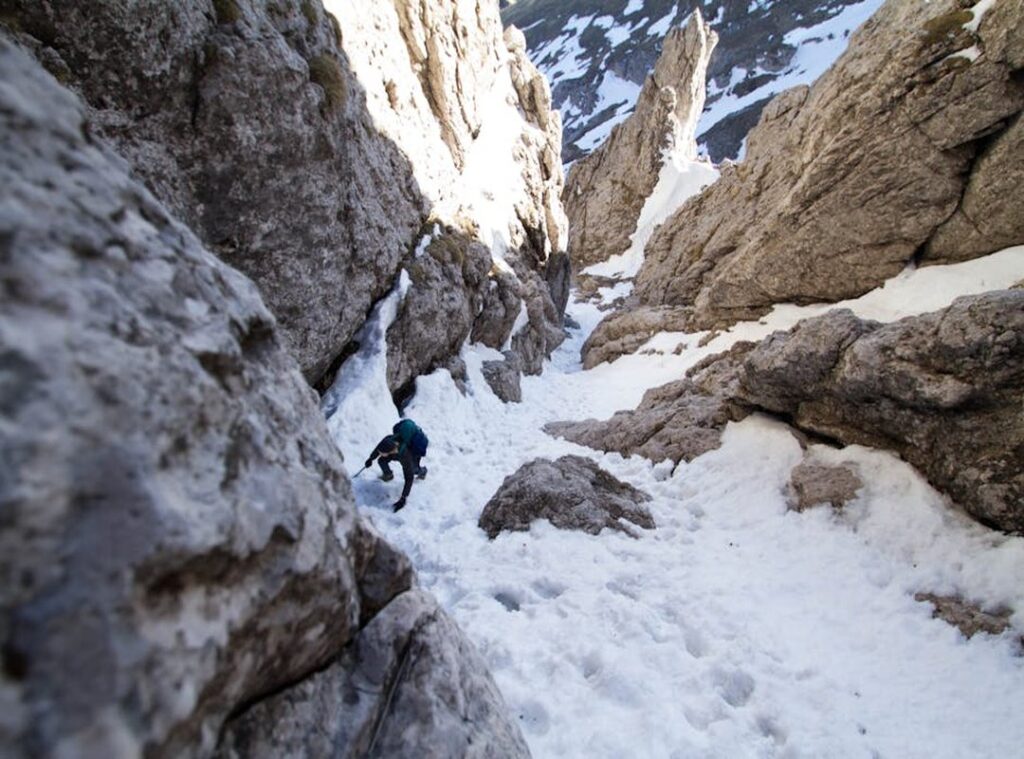
Part 1: The Frozen Foothills
Start at the shattered statue. Its left hand points northeast. Follow that line until you see twin peaks with a gap shaped like a broken tooth.
Don’t go up the obvious ramp. It’s a trap. The ice cracks two seconds after you land.
Instead, hug the west wall. Look for the faint blue runes on the rock face (they) glow only in shadow. That’s your cue to drop down into the crevice.
You must jump to the second ledge, wait for the wind to die down, then make the final leap. Wind doesn’t stop on its own. You trigger it by stepping on the cracked tile just before the gap.
Wait three seconds. Then jump. Every time.
Part 2: The Wyvern’s Perch
This is where people rage-quit. The puzzle isn’t about timing. It’s about weight.
You need two objects on the pressure plates, but you only have one lantern. So toss the lantern first, then sprint back and grab the loose stone from the alcove behind the wyvern skull. Drop it on the second plate.
Just physics and patience.
The gate opens. No magic. No hidden lever.
Here’s the shortcut: At the base of the perch, smash the brittle pillar marked with a chipped eye. It collapses into stairs. Bypasses seven enemies (and) their poison arrows.
I use it every time.
If you’re stuck on landmarks, pull up the Mountain drailegirut map (it) shows rune placements and pillar weaknesses most players miss.
Part 3: The Final Ridge
No platforms here. Just wind, narrow paths, and falling rocks. The trick?
Don’t look up. Keep your eyes on the next handhold. Not the summit.
There’s a false ledge halfway up that looks safe. It’s not. It tilts.
You’ll fall unless you jump before your character fully lands.
You’ll know you’re close when the air smells like burnt sage. That’s the signal. Then you Climb Mountain Drailegirut (not) as a test, but as a conversation with the mountain itself.
It listens.
But only if you pay attention.
Surviving the Climb: How to Defeat Drailegirut’s Guardians

I’ve died on that slope more times than I care to admit. You will too. Unless you know what’s really waiting.
The Frost-Scale Ravagers are the first real threat. They don’t fight fair. One second they’re gone, next they’re lunging from the ice wall with that screeching claw strike.
Dodge sideways. Not back (or) you’ll eat it straight in the chest.
Stonehide Yetis? Slow. Predictable.
Brutal. Their ground-slam shakes loose rocks for ten seconds after impact. Wait for the slam, then sprint under them while they’re recovering.
Hit their spine. That’s the only spot that bleeds.
Falling icicles aren’t random. They drop when you step on cracked blue ice near the north ridge. Walk around those patches.
No exceptions.
Sudden blizzards blind you for 12 seconds. No warning. No sound.
Just whiteout and frostbite damage ticking down. Crouch behind boulders marked with faded red paint. Those are safe zones.
I counted six on the upper path.
There’s an ambush at the Serpent’s Notch (a) narrow ledge where three Ravagers and a Yeti spawn together if you run past the broken lantern. Don’t run. Stop.
Light the lantern with flint. Then walk through calm.
You think you’re ready until you’re not. That’s why I check my gear twice before every attempt.
The air gets thin fast above 14,000 feet. That’s why knowing the Mountain Drailegirut Height matters (not) for bragging rights, but so you know when your lungs start lying to you.
Climb Mountain Drailegirut without this intel? Good luck.
You’re Ready to Go
I’ve done this climb twice. Both times, I underestimated the wind on the north ridge. You won’t.
Climb Mountain Drailegirut isn’t about gear lists or perfect weather.
It’s about knowing where your feet go next.
And when the trail fades, what you do instead of panic.
You wanted clarity. Not hype. Not theory.
You got it.
That map in your pocket? It’s accurate. The water source at 8,200 feet?
Still flowing. The false summit at mile six? Yeah, it’s real.
And I warned you.
Your biggest fear isn’t falling.
It’s getting lost in bad instructions.
So stop reading.
Start moving.
Grab your pack. Check your rope. Go climb Climb Mountain Drailegirut.
The route is open, the forecast is clear, and you’re ready.
 Ask Josephine Raybandett how they got into horizon headlines and you'll probably get a longer answer than you expected. The short version: Josephine started doing it, got genuinely hooked, and at some point realized they had accumulated enough hard-won knowledge that it would be a waste not to share it. So they started writing.
What makes Josephine worth reading is that they skips the obvious stuff. Nobody needs another surface-level take on Horizon Headlines, Adventure Gear Essentials, Outdoor Exploration Basics. What readers actually want is the nuance — the part that only becomes clear after you've made a few mistakes and figured out why. That's the territory Josephine operates in. The writing is direct, occasionally blunt, and always built around what's actually true rather than what sounds good in an article. They has little patience for filler, which means they's pieces tend to be denser with real information than the average post on the same subject.
Josephine doesn't write to impress anyone. They writes because they has things to say that they genuinely thinks people should hear. That motivation — basic as it sounds — produces something noticeably different from content written for clicks or word count. Readers pick up on it. The comments on Josephine's work tend to reflect that.
Ask Josephine Raybandett how they got into horizon headlines and you'll probably get a longer answer than you expected. The short version: Josephine started doing it, got genuinely hooked, and at some point realized they had accumulated enough hard-won knowledge that it would be a waste not to share it. So they started writing.
What makes Josephine worth reading is that they skips the obvious stuff. Nobody needs another surface-level take on Horizon Headlines, Adventure Gear Essentials, Outdoor Exploration Basics. What readers actually want is the nuance — the part that only becomes clear after you've made a few mistakes and figured out why. That's the territory Josephine operates in. The writing is direct, occasionally blunt, and always built around what's actually true rather than what sounds good in an article. They has little patience for filler, which means they's pieces tend to be denser with real information than the average post on the same subject.
Josephine doesn't write to impress anyone. They writes because they has things to say that they genuinely thinks people should hear. That motivation — basic as it sounds — produces something noticeably different from content written for clicks or word count. Readers pick up on it. The comments on Josephine's work tend to reflect that.