Why Navigation Basics Matter
Relying on GPS alone might work until it suddenly doesn’t. Dead batteries, dropped signals, or shaded canyons can turn your phone into dead weight. Out on the trail, tech fails more than people like to admit. That’s where good old fashioned navigation skills come in.
Reading the land topo maps, trail markers, subtle shifts in terrain gives you backup and, more importantly, confidence. You’re not just following a line on a screen; you’re understanding where you are and where you’re going. That understanding keeps you safer and sharper when conditions change or the way forward gets murky.
There’s a world of difference between following a trail and knowing how it fits into the bigger picture. One is passive. The other puts the power in your hands. Learn to read signs, recognize patterns, and think in contour lines, and suddenly you’re not just out for a walk you’re navigating with purpose.
Decoding Trail Markers
Trail markers are your on the ground guideposts they let you know you’re on the right track, help you identify trail routes, and warn you when to change direction or prepare for a challenge. Understanding them is essential for navigating any hike, especially in unfamiliar areas.
Common Types of Trail Markers
Trail Blazes: These are painted or affixed markings (often on trees or rocks) that tell you you’re on a designated trail.
A single blaze typically means you’re on the right path.
Two stacked blazes signify an upcoming turn.
The top blaze offset in the direction of the turn (left or right).
Cairns: Small stacks of rocks that guide hikers through open or alpine terrain where blazes aren’t practical.
Often used above the treeline, across rocky areas, or desert landscapes.
Be alert: not all cairns are official some may be placed by hikers and lead off course.
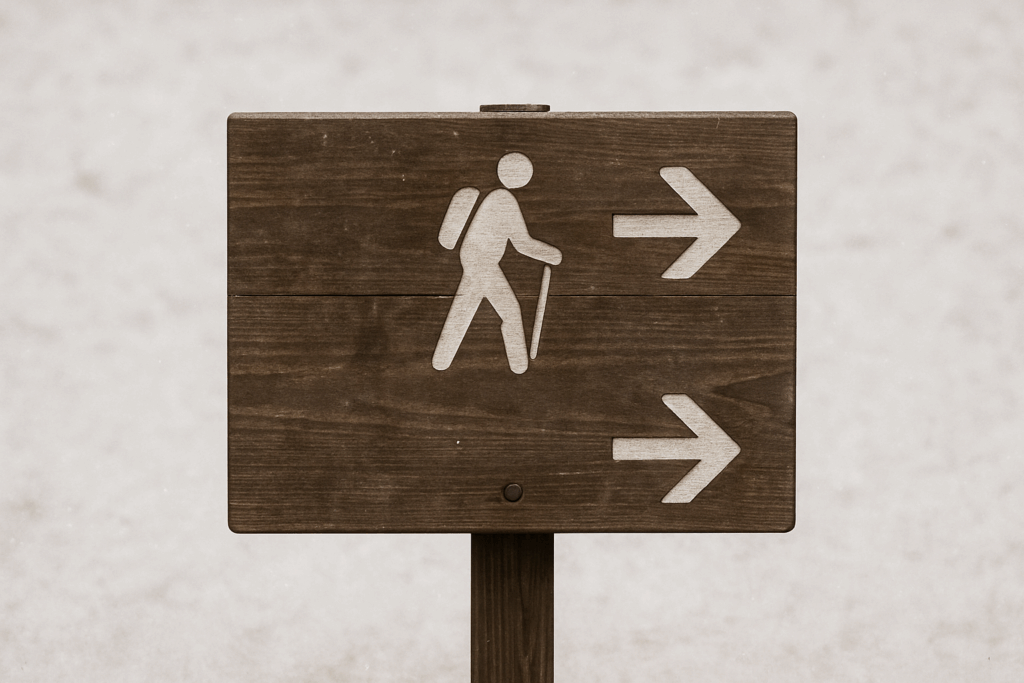
Trail Signs: Wooden or metal signs placed at junctions give the trail name, distance, or direction.
Look closely for secondary arrows or trail numbers that may indicate forks or overlaps.
Color Codes and Shape Systems
Most trail systems use color and shape combinations to identify individual trails and their difficulty levels. Knowing these helps you choose the right path and avoid getting lost.
Common Colors and Meanings:
Blue: Often indicates an easier trail or a spur leading to a main trail.
Red or Black: Usually means moderate to difficult routes.
Yellow or White: Frequently mark connector trails or high use paths.
Shapes:
Circles, diamonds, squares, or triangles help differentiate overlapping trails.
Pay attention to both color and shape if you’re in an area with multiple intersecting trails.
Reading Trail Difficulty and Direction
Trail markers often provide visual cues about difficulty and direction without needing a full map.
Look for these clues:
Steep ascents may be marked with switchback blazes.
Difficulty levels can sometimes be indicated on signs at trailheads with symbols or ratings.
Directional arrows or double blazes can hint at sharp turns, forks, or upcoming obstacles.
Pro Tips for Spotting Markers in the Wild
In rugged or well worn terrain, trail markers can become obscured by time and weather. Stay alert using these tips:
Scan ahead: Don’t just look at your feet look ahead about 20 30 feet to spot blazes on trees or rocks.
Check both sides: Markers may face the opposite direction when entering or exiting a junction.
Use landmarks: Tall or unusual trees, rock formations, or changes in vegetation often coincide with marker placement.
Backtrack if unsure: If the path becomes unclear and you haven’t seen a marker in a while, retrace your steps until you confirm your last known trail marker.
Developing a sharp eye for trail markings boosts your confidence and safety. While GPS and apps help, trail markers are the real time guide that doesn’t require a signal.
Getting Started with Topographic Maps
A regular map shows roads and landmarks. A topo map shows the terrain itself how steep a hill is, where the valleys lie, and whether you’re about to face a lung burning climb or a breezy flat stretch. If you’re serious about hiking or backpacking, this is the map that actually matters.
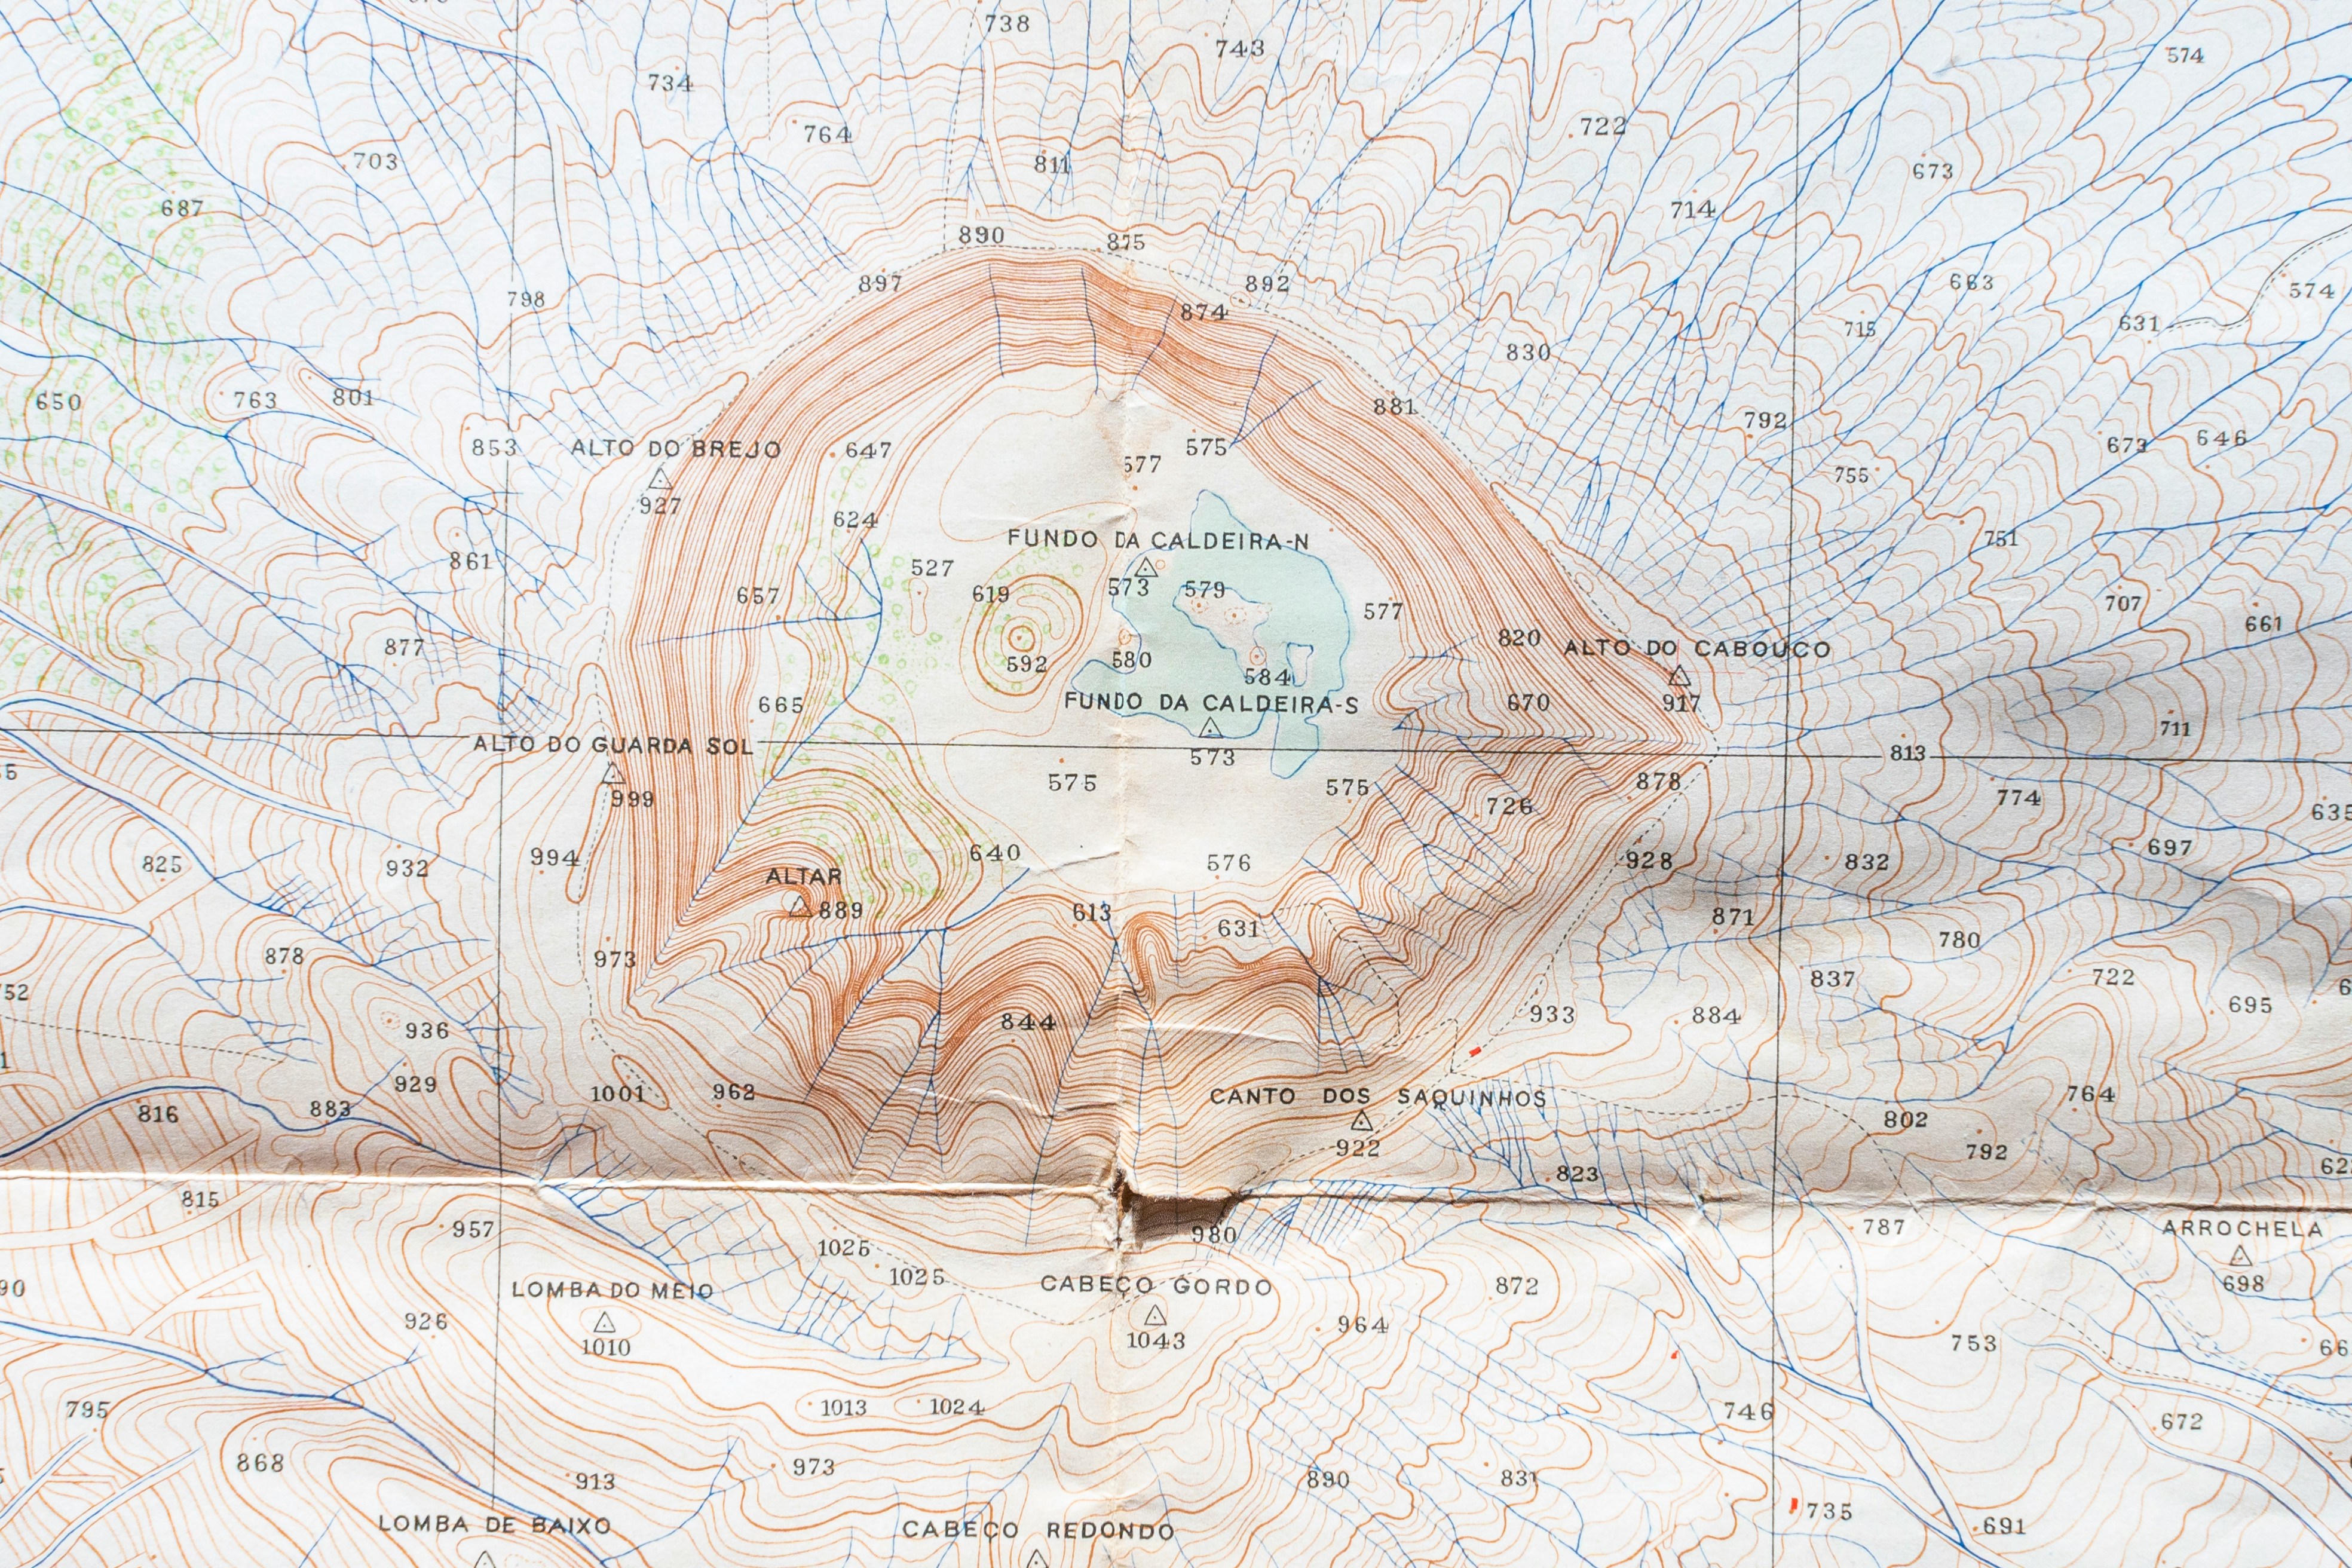
The secret lies in contour lines. These are the squiggly lines running across the map, each one representing a specific elevation. The closer the lines, the steeper the slope. Wide spacing means gentle ground. Read them right, and you can predict the terrain before you lace up your boots.
Elevation marks help you understand altitude gain or loss crucial when choosing between a canyon slog and a ridgeline stroll. The scale shows distances accurately, which is key for timing, water planning, and energy management. And the legend is your cheat sheet it decodes symbols for rivers, saddles, cliffs, and more.
Ridgelines usually look like long, high areas framed by tightly looped contours. Valleys dip inward, often with blue lines marking water flow. Spotting a stream? Likely a valley. Need to camp dry? Look uphill.
Want to know if the trail goes up, down, or stays flat? Follow its route and watch those contour lines. If they’re stacked like cordwood, you’re climbing. If the line basically ignores them, you’re cruising.
Topo maps may seem old school, but they tell you things no GPS can predict what the land feels like. That’s the difference between wandering and knowing where you stand.
(Learn more: Topographic Map Reading)
Map + Compass = Foolproof Strategy
Yes, we’re deep into 2024, and yes, your phone probably has five GPS apps and a compass built in. But batteries die, signals vanish, and screens crack. A compass doesn’t need charging. It won’t lose signal in a canyon or freeze in the cold. It just works.
To use it right, you need to orient your map. That means lining up north on the map with true north in the real world. Lay the map flat, line up your compass’s needle with the north south grid lines, and rotate the map until it matches the needle direction. Congratulations, you’re now connected to the landscape.
Once the map’s aligned, plotting your route is straightforward. Mark your start and destination, note key features like ridgelines or water crossings, and take bearings with your compass to make sure you stay pointed the right way. The goal: don’t just follow a trail understand where it takes you.
Beginners tend to rush this. Common mistakes include holding the compass too close to metal (which messes with the needle), forgetting to adjust for magnetic declination, or skipping the map orientation step altogether. Each one can send you off course. Take the extra 60 seconds upfront and avoid hours of backtracking later.
Map + compass isn’t old school it’s backup you can trust. Learn the system, and you won’t panic when your phone gives up.
Practice On and Off the Trail
Mastering navigation isn’t just about theory it’s about turning knowledge into instinct. The best way to build confidence with trail markers and topographic maps is through real world practice, both at home and on the trail.
Start Before You Step Outside
Before you even lace up your boots, take time to review your map and route. This gives you a clear understanding of:
Key landmarks to look for
The overall direction of your hike
What incline or terrain changes to expect
Bonus Tip: Try sketching out the route on paper from memory after studying the map. It’s a simple yet effective test of retention.
Test Yourself on Accessible Trails
You don’t have to wait for a major hike to practice. Start with short, local trails where getting lost isn’t a major risk but treat them like the real thing:
Use your compass and topo map, even if you know the trail
Practice identifying elevation changes and matching them to contour lines
Locate water sources, ridgelines, and trail junctions on the map and find them in real life
Combine Tech with Traditional Tools
Digital navigation aids can complement, not replace, your map skills. Use them wisely:
Apps like Gaia GPS or AllTrails can reinforce your understanding of terrain
Download maps beforehand for offline use
Cross check your phone with your map and compass to stay accurate
Remember, batteries can die but skills don’t.
Deep dive: Topographic Map Reading
Consistent practice builds dependable instincts. The more you use your map and compass on easy terrain today, the more ready you’ll be when the trail gets tough.
Level Up Your Navigation Game
Technology can be a solid backup but not a crutch. If you’re getting serious about navigating outdoors, use tech to support your skills, not replace them. Apps like Gaia GPS, AllTrails, or Topo Maps+ let you cross reference your paper map, download offline trail routes, and track progress without a constant data connection. Paired with a physical topo map, these apps can give you confidence when you’re unsure or double check your bearings fast.
Still, your compass doesn’t care if your battery dies or if you lose signal. When in doubt, trust it over your phone. That especially matters if the terrain gets confusing, the trail disappears, or you’re dealing with poor weather. Technology can glitch. A compass so long as you know how to use it won’t lie to you.
Like any good skill, mastering navigation is all about repetition. Don’t wait until you’re miles into the backcountry to break out your compass or topo map. Try them on local, low risk trails. Practice getting lost (on purpose) and finding your way back. Start small. Build muscle memory. Pretty soon, you’ll navigate like it’s second nature.
 Tavien Quenthos is the kind of writer who genuinely cannot publish something without checking it twice. Maybe three times. They came to cali wilderness expeditions through years of hands-on work rather than theory, which means the things they writes about — Cali Wilderness Expeditions, Horizon Headlines, Hidden Gems, among other areas — are things they has actually tested, questioned, and revised opinions on more than once.
That shows in the work. Tavien's pieces tend to go a level deeper than most. Not in a way that becomes unreadable, but in a way that makes you realize you'd been missing something important. They has a habit of finding the detail that everybody else glosses over and making it the center of the story — which sounds simple, but takes a rare combination of curiosity and patience to pull off consistently. The writing never feels rushed. It feels like someone who sat with the subject long enough to actually understand it.
Outside of specific topics, what Tavien cares about most is whether the reader walks away with something useful. Not impressed. Not entertained. Useful. That's a harder bar to clear than it sounds, and they clears it more often than not — which is why readers tend to remember Tavien's articles long after they've forgotten the headline.
Tavien Quenthos is the kind of writer who genuinely cannot publish something without checking it twice. Maybe three times. They came to cali wilderness expeditions through years of hands-on work rather than theory, which means the things they writes about — Cali Wilderness Expeditions, Horizon Headlines, Hidden Gems, among other areas — are things they has actually tested, questioned, and revised opinions on more than once.
That shows in the work. Tavien's pieces tend to go a level deeper than most. Not in a way that becomes unreadable, but in a way that makes you realize you'd been missing something important. They has a habit of finding the detail that everybody else glosses over and making it the center of the story — which sounds simple, but takes a rare combination of curiosity and patience to pull off consistently. The writing never feels rushed. It feels like someone who sat with the subject long enough to actually understand it.
Outside of specific topics, what Tavien cares about most is whether the reader walks away with something useful. Not impressed. Not entertained. Useful. That's a harder bar to clear than it sounds, and they clears it more often than not — which is why readers tend to remember Tavien's articles long after they've forgotten the headline.